So you’ve just signed up for Bahasha—congrats and welcome! 🎉 You're moments away from launching powerful WhatsApp Broadcast Campaigns, training smart AI chat assistants, and automating communication with your customers at scale.
But before any of that can happen, you’ll need to complete one important step:
Connect your WhatsApp Business Account using Meta’s Embedded Signup flow.
Let’s walk through what that process looks like inside Bahasha and what to expect along the way.
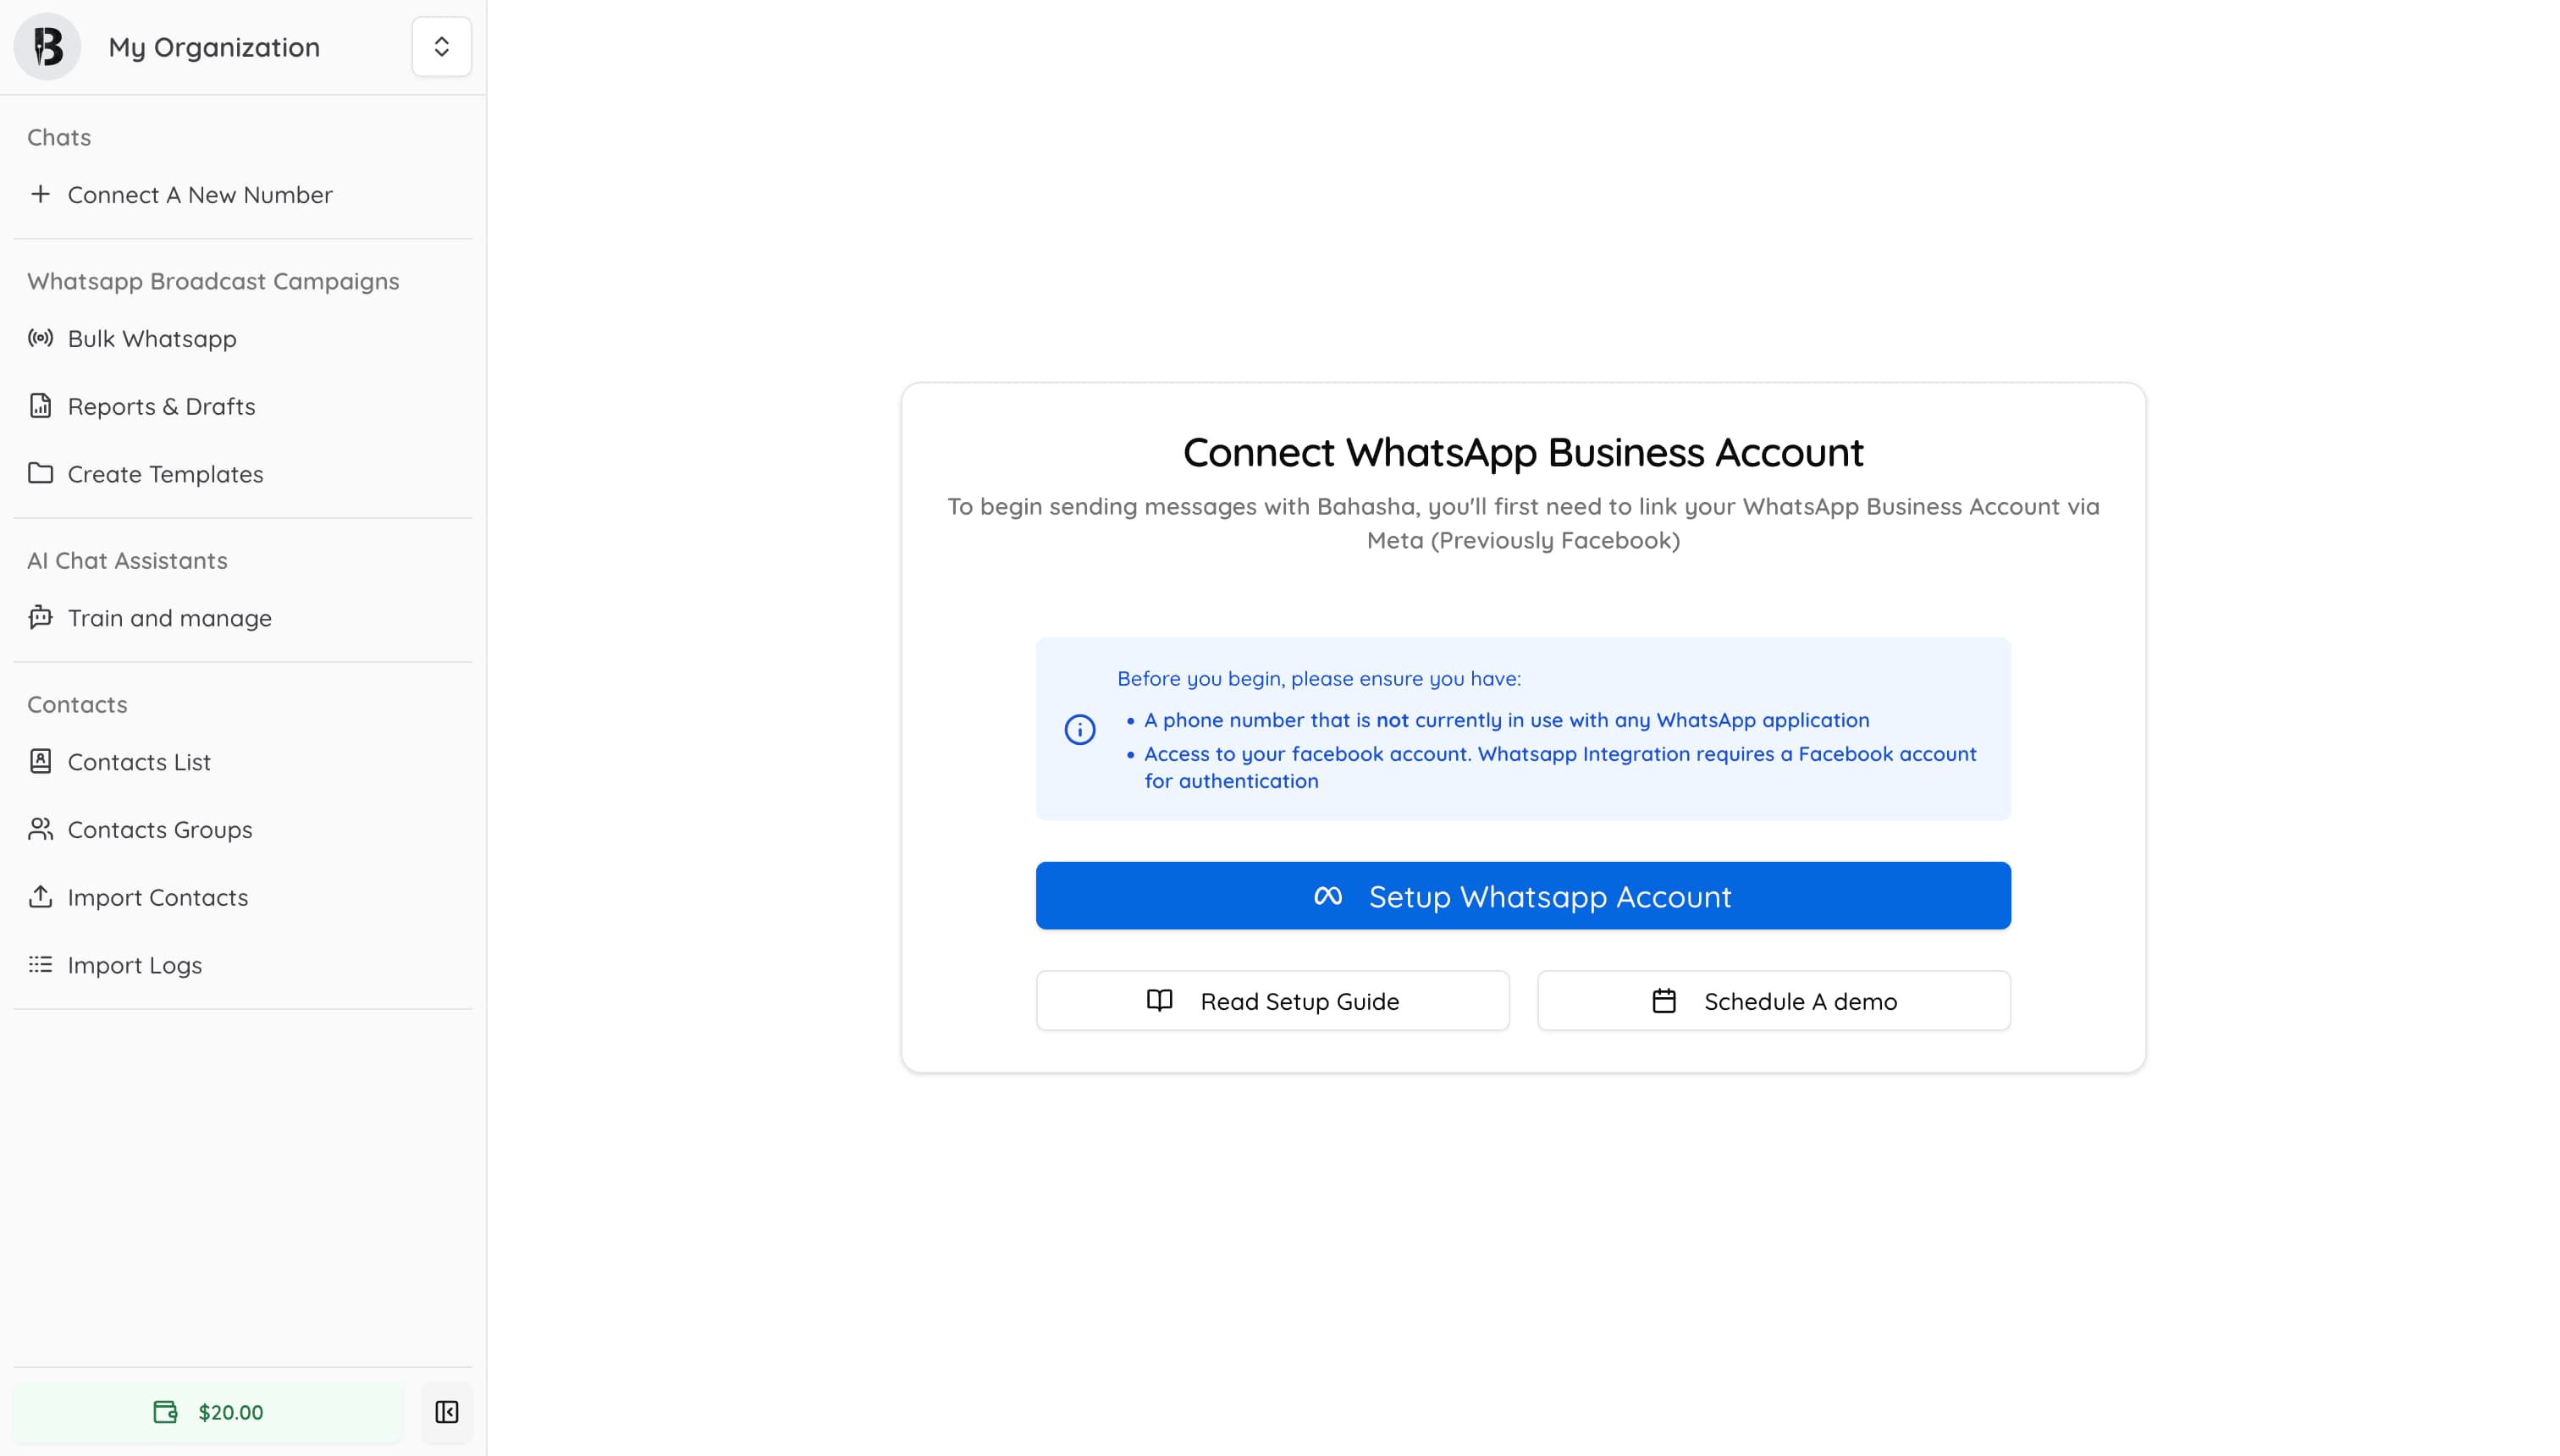
As soon as you log into Bahasha for the first time, you’ll see this screen prompting you to get started:
Bahasha Dashboard for a newly created Account
Bahasha integrates directly with Meta’s Embedded Signup experience—powered by Facebook Login for Business. When you click the blue "Setup WhatsApp Account" button, the flow begins in a seamless pop-up window or a new tab.
Before clicking, make sure you have:
✅ A phone number not already in use with any WhatsApp app.
✅ Access to your Facebook account.
Here’s what happens next when the embedded window appears:
You’ll be prompted to log in with your Facebook. This step is used to verify your identity and begin associating your WhatsApp Business account with Bahasha. Click "Continue as ..."
After logging in, you’ll be asked to grant Bahasha access to your WhatsApp assets. This includes permissions needed for you to:
Send messages through Bahasha
Manage WhatsApp templates
Access message delivery reports
Click "Get Started"
Next, Meta will ask you to either:
Choose an existing business portfolio (from your Meta Business Manager), or
Create a new business account if you don’t have one yet.
Now it’s time to:
Select an existing WABA, or
Create a new one from scratch
You’ll be prompted to:
Enter a display name (what users will see in WhatsApp instead of your number)
Choose a business category
Confirm your business timezone and details (you may need to expand more options to see this)
You’ll then:
Add the business phone number you want to use for WhatsApp
Receive a 6-digit verification code via SMS or voice call
Enter the code to complete verification
🔐 Important: The number must not be actively registered on WhatsApp, WhatsApp Business, or WhatsApp Web.
At the end of the signup flow, Meta may prompt you with a green button to “Add Payment Method.” While this step is optional during the initial setup, we strongly recommend doing it right away for a smooth Bahasha experience.
If you skip it for now, you can still add a payment method later via your Meta Business Manager. Check related Article below.
💳 WhatsApp messaging costs are billed through Meta, and connecting a valid payment method is required to send messages via Bahasha.
While Meta charges you for message delivery, Bahasha also operates its own billing system for platform services like AI assistants, advanced features, and campaign tools.
Your wallet balance and transaction history are all visible inside Bahasha, right in your team dashboard. Check out our pricing here
Once you’ve completed the flow and granted access, Bahasha will finalize the connection and redirect you back to the dashboard. From here, you can:
✉️ Send bulk WhatsApp messages
🧠 Train AI Chat Assistants
🗂️ Import and manage contacts
📄 Design message templates that drive engagement
If anything's unclear or if you'd like assistance with the Meta setup, you can:
Or “Schedule a Demo” with our team for guided onboarding
Welcome to Bahasha—let’s start messaging !